


")
7 Classes of Makeup: What They Do, How They’re Applied, and the Dos and Don’ts
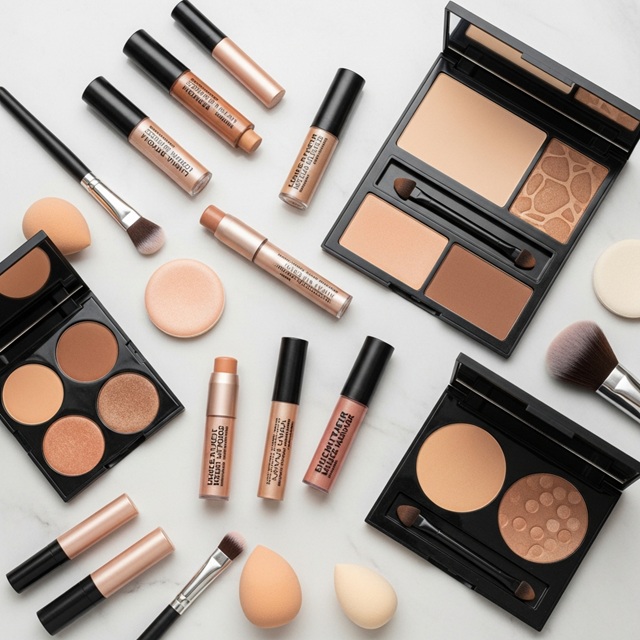
Makeup is more than color on the skin—it’s a form of art, identity, and self-expression. But behind every polished look lies a set of distinct makeup classes that serve unique purposes. Whether you’re creating a natural glow for daytime or a dramatic transformation for an evening event, understanding these classes helps you apply products correctly, mix them wisely, and avoid common beauty mistakes.
In this guide, we’ll explore the 7 classes of makeup in depth—what they do, how they’re applied, whether they can be mixed, and their dos and don’ts.
1. Foundation Makeup
Foundation is the base layer that unifies your skin tone and provides a smooth surface for the rest of your makeup. It’s one of the most essential and versatile products in the makeup world.
What It Does
Foundation evens out skin texture and tone by covering blemishes, redness, and discoloration. It creates a flawless base that enhances the appearance of other products layered on top.
How It’s Applied
Use clean fingers, a makeup sponge, or a foundation brush, depending on the texture—liquid, cream, or powder. Apply in thin layers, blending from the center of the face outward to avoid harsh lines.
Are They Mixable?
Yes, but with caution. You can mix two shades to match your exact skin tone or blend different formulations (like matte and dewy) to achieve your desired finish. However, avoid mixing water-based with oil-based foundations—they’ll separate.
Dos and Don’ts
Do: Moisturize first for smooth application.
Don’t: Apply too much; it can look cakey.
Do: Match your neck, not just your face.
Don’t: Forget to set with powder if you have oily skin.
Similarity
Foundation is often confused with concealer, but while both provide coverage, foundation covers larger areas and evens tone, while concealer targets specific imperfections.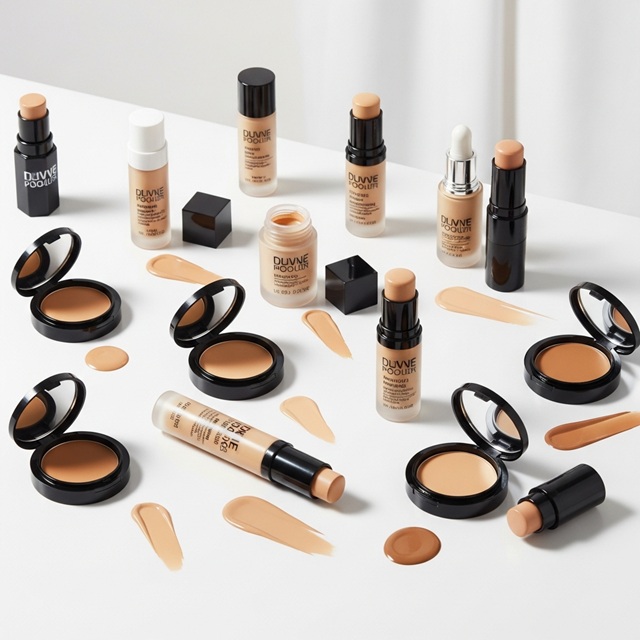
2. Concealer Makeup
If foundation is your canvas, concealer is your correction pen. It’s the secret behind hiding dark circles, blemishes, and spots that foundation alone can’t fully cover.
What It Does
Concealer brightens dull areas and hides imperfections. It comes in liquid, cream, or stick form, with different levels of coverage.
How It’s Applied
Apply after foundation to the under-eye area, around the nose, and on blemishes. Use a small brush or fingertip to tap (not rub) the product until it blends seamlessly into the skin.
Are They Mixable?
Yes, especially for creating custom shades. Some makeup artists mix peach or orange-toned concealers with skin-colored ones to neutralize dark circles more effectively.
Dos and Don’ts
Do: Use a shade one or two tones lighter for brightening under the eyes.
Don’t: Overapply—it can crease and emphasize fine lines.
Do: Set with a light powder for longevity.
Don’t: Forget color correction when needed; use green for redness and peach for dark circles.
Similarity
Like foundation, concealer offers coverage, but it’s thicker and more pigmented for targeted areas.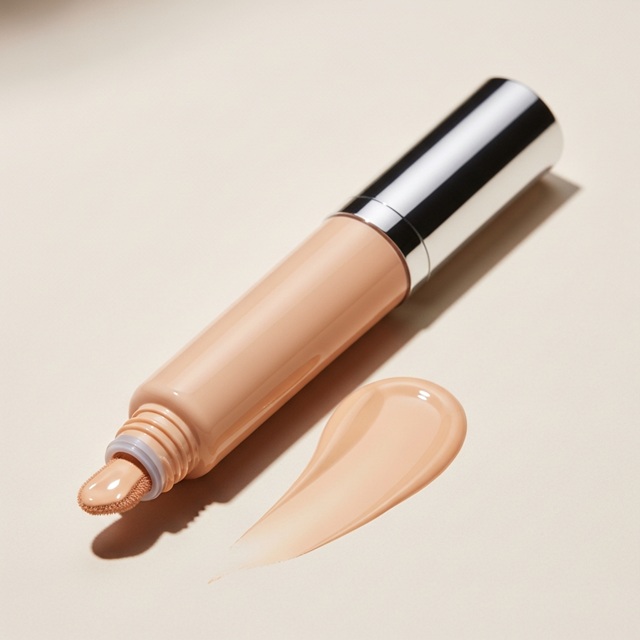
- Prep the skin: Start by applying a primer to help smooth out the skin’s texture and create a base for the foundation and concealer.
- Apply foundation: Use a makeup sponge or brush to apply foundation to the skin, starting in the center of the face and blending outwards. Be sure to blend the foundation into the hairline and jawline to avoid any harsh lines.
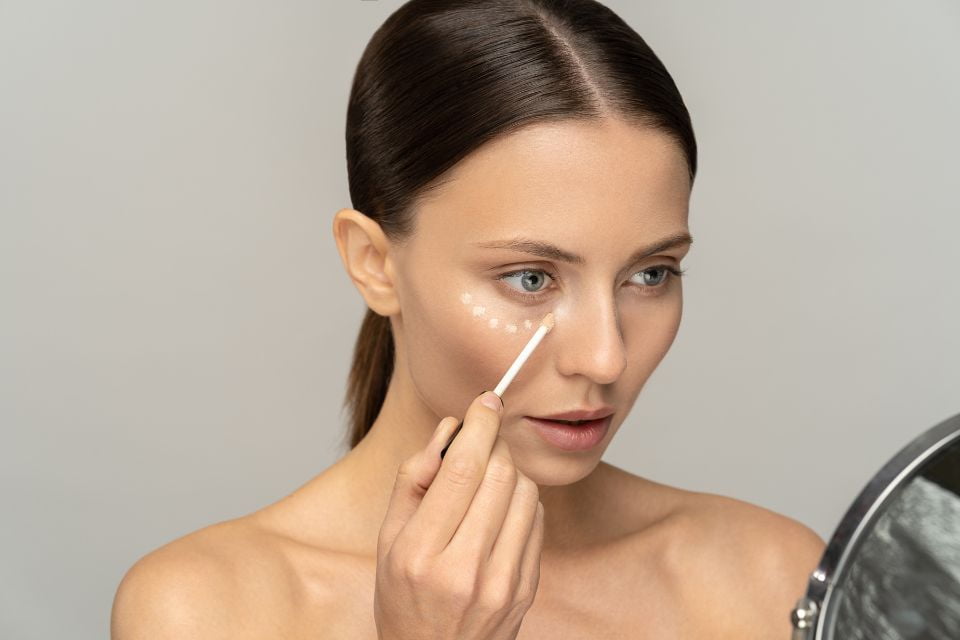
- Conceal imperfections: Use a small brush or your fingertips to apply concealer to blemishes, dark spots, and under-eye circles. Gently blend the concealer into the skin for a seamless finish.
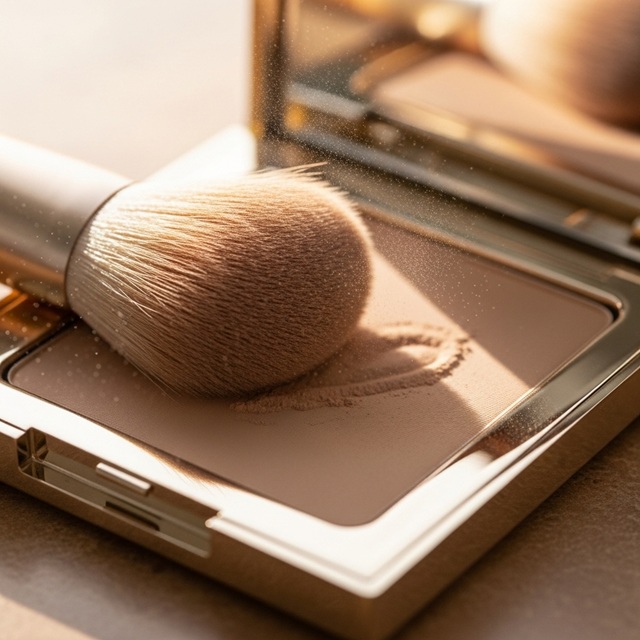
3. Powder Makeup
Powder is like the finishing touch that seals your look. It sets your base, controls shine, and adds a soft-focus effect that keeps you photo-ready.
What It Does
Powder absorbs excess oil, sets liquid or cream products, and provides a matte or satin finish. It’s available as loose or pressed powder.
How It’s Applied
Use a fluffy brush to dust powder lightly over your face, focusing on oily zones like the T-zone. For more coverage, press the powder in with a puff or sponge.
Are They Mixable?
Yes, you can mix translucent with tinted powders or shimmer with matte to achieve a custom finish. However, be careful not to over-layer—it can dull your complexion.
Dos and Don’ts
Do: Choose a fine-milled powder to avoid texture buildup.
Don’t: Apply too much; it can dry out your skin.
Do: Reapply gently during the day for oil control.
Don’t: Use powder over heavy cream without blending—it can cause patchiness.Similarity
Powder and setting spray both extend makeup wear, but powder mattifies while spray gives a dewy or natural finish.
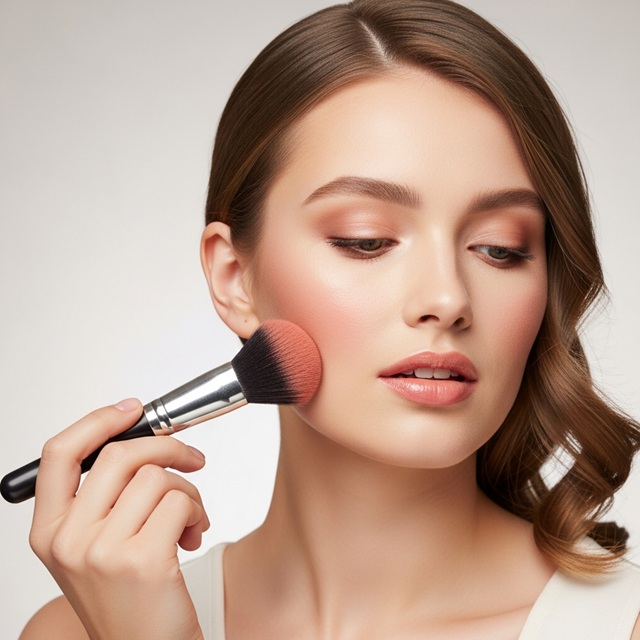
4. Blush Makeup
Blush brings life to your complexion—it mimics a healthy, natural flush that instantly makes the face look fresh and awake.
What It Does
Blush adds color to the cheeks, balancing the face and enhancing your natural features. It’s available in cream, powder, and liquid formulas.
How It’s Applied
Smile slightly and apply blush to the apples of your cheeks, blending upward toward your temples. Cream and liquid formulas can be applied with fingers or a damp sponge, while powders work best with a soft brush.
Are They Mixable?
Yes. You can layer cream blush under powder blush for extra longevity or mix shades to create your ideal tone—just ensure the textures blend smoothly.
Dos and Don’ts
Do: Choose blush shades that complement your skin tone (peach for warm, rose for cool).
Don’t: Place blush too close to your nose—it can make your face appear smaller.
Do: Blend thoroughly to avoid harsh lines.
Don’t: Skip it—without blush, makeup can look flat.Similarity
Blush is often compared with bronzer, but bronzer adds warmth and depth, while blush adds freshness and color.
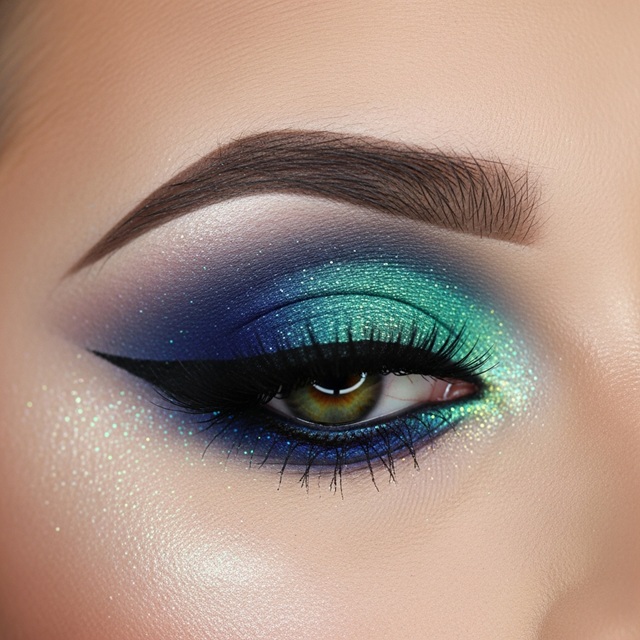
5. Eyeshadow Makeup
Eyeshadow is where creativity shines. It transforms your eye shape, enhances color, and sets the tone for your entire look.
What It Does
Eyeshadow adds dimension and drama to the eyes. It can be matte, shimmery, metallic, or glittery—each creating different moods and effects.
How It’s Applied
Start with a base shade over the lid, add a darker tone to the crease for depth, and highlight the inner corner or brow bone for brightness. Blend well for a seamless transition between colors.
Are They Mixable?
Absolutely! Eyeshadows are meant to be mixed. Layering different tones and finishes helps create depth and a customized look.
Dos and Don’ts
Do: Use an eyeshadow primer for long-lasting wear.
Don’t: Use too many contrasting colors at once—it can look messy.
Do: Blend edges for a smooth finish.
Don’t: Ignore your brow bone and inner corner—highlighting them makes a huge difference.Similarity
Eyeshadow and eyeliner both define the eyes, but eyeshadow provides depth and color, while eyeliner outlines and sharpens.
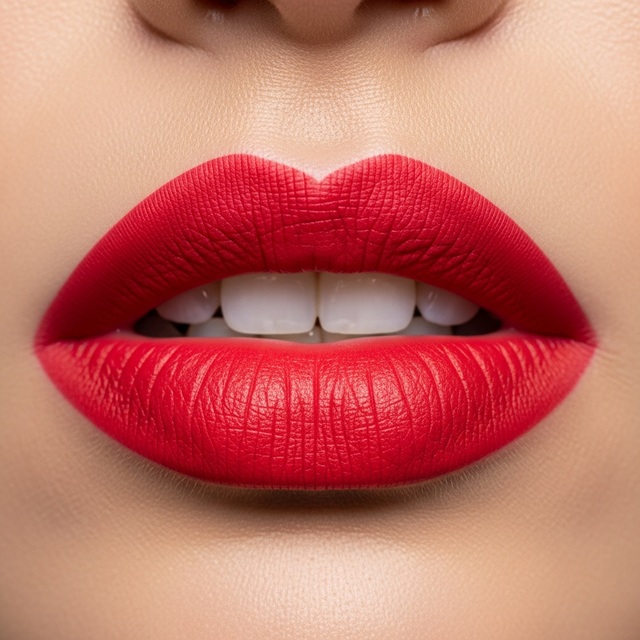
6. Lip Makeup
Lip makeup completes your look—it can turn a simple style into a statement or add a soft, natural glow.
What It Does
Lip makeup includes lipstick, gloss, liner, and stains. These products define the lips, add color, and enhance shape and fullness.
How It’s Applied
Outline your lips with liner to define edges, then fill with lipstick or gloss. For a more modern look, blend slightly outside the lip line or dab color at the center for a gradient effect.
Are They Mixable?
Yes, and that’s half the fun. Mixing lip colors creates personalized shades. Lip gloss can be layered over matte lipstick for shine.
Dos and Don’ts
Do: Exfoliate and moisturize lips before applying color.
Don’t: Overline too much—it can look unnatural.
Do: Choose long-wearing formulas for events.
Don’t: Forget to check your teeth for lipstick smudges.Similarity
Lip gloss and lipstick serve similar goals but differ in finish—gloss gives shine, lipstick gives color intensity.
7. Highlighter and Contour Makeup
Highlighter and contour are like light and shadow—they sculpt your face and bring out your best features.
What They Do
Contour defines and shapes the face using darker tones, while highlighter emphasizes high points with light-reflecting pigments. Together, they create dimension and balance.
How They’re Applied
Apply contour under cheekbones, along the jawline, and at the sides of the nose. Apply highlighter to the cheekbones, bridge of the nose, brow bone, and cupid’s bow. Blend thoroughly for a natural effect.
Are They Mixable?
Yes, especially cream-to-powder combinations. Mixing subtle highlight with blush or contour can create a seamless gradient, but avoid overdoing both.
Dos and Don’ts
Do: Blend properly—harsh lines ruin the illusion.
Don’t: Apply shimmer-heavy highlighters on textured skin.
Do: Use a small amount at a time and build up.
Don’t: Contour with shades that are too dark—it can look muddy.Similarity
Contour and bronzer often overlap, but bronzer warms the face, while contour sculpts and defines.
Understanding the 7 Classes of Makeup
Each of these 7 classes of makeup—foundation, concealer, powder, blush, eyeshadow, lip makeup, and highlighter/contour—serves a unique purpose but works together to create balance, depth, and harmony.
When applied correctly, makeup doesn’t just change how you look—it enhances what’s already beautiful.
Understanding what it does, how it’s applied, whether it’s mixable, and the dos and don’ts helps you build a personalized makeup routine that fits your skin type, occasion, and mood.

FAQs About the 7 Classes of Makeup
1. Can I skip some classes of makeup and still look complete?
Yes. A basic look can be achieved with foundation, mascara, and lip color. The rest adds dimension and detail for a more defined look.
2. Should I apply concealer before or after foundation?
Usually, after the foundation, you don’t move the product around unnecessarily. However, for lighter coverage days, concealer alone can work.
3. Can I use bronzer instead of contour?
Yes, but results differ. Bronzer adds warmth, while contour defines structure. Use bronzer for a sun-kissed glow and contour for sculpting.
4. How do I choose the right foundation shade?
Test on your jawline in natural light. It should blend seamlessly into both your face and neck.
5. What’s the best order to apply these classes of makeup?
The general order is: primer → foundation → concealer → powder → contour/blush/highlighter → eyeshadow → eyeliner → mascara → lips.


")